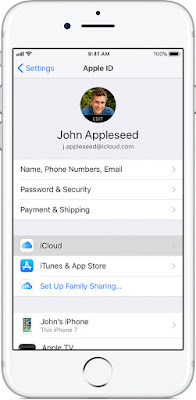
အရင္ဆံုး မိမိဖုန္းထဲကေန App Store ကိုဖြင့္ပါ။
ျပီးရင္အဆင္ေျပတဲ့ Free app တစ္ခုကိုေဒါင္းလိုက္ပါ။
Apple ID ေတာင္းပါလိမ့္မယ္။ Create New Apple ID ကိုႏွိပ္လိုက္ပါ။
ျပီးသြားရင္ေတာ့ Store ကို U.S (or)Singapore လို႔ေရြးေပးလိုက္ပါ။
Next ကိုႏွိပ္ Agree ကိုႏွိပ္ၿပီးေတာ့ ဆက္သြားလိုက္ပါ။ Gmail အသစ္ နဲ႔ ကိုယ္လိုျခင္းတဲ့
password ထည့္ပါ။ Password ထည့္တဲ့ေနရာမွာ အနည္းဆံုး 8 လံုးထည့္ရမွာျဖစ္ၿပီးေတာ့ စာလံုးႀကီးတစ္လံုးႏွင့္ ဂဏန္းတစ္လံုးပါဝင္ရမွာျဖစ္ပါတယ္။ ဥပမာ (Zaw321456)
ျပီးရင္ Question နဲ႔ Answer မွာ ကိုယ္မွတ္မိ လြယ္မည့္ ေမးခြန္းနဲ႔ အေျဖကုိထည့္လိုက္ပါ။
ေတာ္ေတာ္ေလးအေရးႀကီးပါတယ္။
တကယ္လို႔ မိမိ Password ေမ့သြားခဲ့ရင္ ျပန္ေျဖေပးရမွာျဖစ္ပါတယ္။ ၿပီးေတာ့ ေမြးေန႔ ရက္ လ ေတြကိုအမွန္အတိုင္း ထည့္ပါ ၿပီးရင္ Next ကိုႏွိပ္ၿပီးေတာ့ ဆက္သြားပါ။
ကဲ အခု Billing Information ထည့္ရမည့္ ေနရာကို ေရာက္ပါၿပီ။ ဒီအဆင့္မွာ Visa ,
MasterCard , Amex , None ဆိုၿပီးေတာ့ ရွိပါတယ္။
ၿပီးရင္ Title မွာ Mr/Ms ေရြးပါ။
ျပီးရင္ First Name နဲ႔ Last Name ထည့္ပါ။
ပထမ Address ေနရာမွာ 22*99 လို႔ေရးထည့္ပါ။
ဒုတိယ Address ကmiddleလိုထည္ပါ
City ေနရာမွာ Asd12565 လို႔ေရးထည့္ပါ။
State မွာ AZ-Arizona ကိုေရြးေပးလို္က္ပါ။
ၿပီးရင္ Zip ေနရာမွာ 85123 လို႔ေရးထည့္လိုက္ပါ။
ဖုန္းနံပတ္မွာ 520 5500854 ကိုထည့္ပါ။ (အေပါ ္ဆံုးမွာ USလိုေရြးခဲ့သူအတြက္ပါ။)
ဒါမွမဟုတ္ Singapore လိုေရြးခဲ႔သူက
ပထမ Address ေနရာမွာ 32or 64 လို႔ေရးထည့္ပါ။
ဒုတိယ Address ကmiddle လို့ထည္ပ့ါ
City ေနရာမွာ Sentosa လို႔ေရးထည့္ပါ။
ျပီးရင္ Zip ေနရာမွာ 616604လို႔ေရးထည့္လိုက္ပါ။
ဖုန္းနံပတ္မွာ 4562846ကိုထည့္ပါ၊ ၿပီးသြားရင္ Next ကိုႏွိပ္ပါ။
ျပီးသြားရင္ေတာ့ Verify Your Account ဆိုၿပီး ကိုယ့္ရဲ႕Gmail မွာ Verify လုပ္ဖို႔ေျပာပါလိမ့္မယ္။
Gmail app ထဲကိုဝင္ၿပီး ခုဏထည့္ခဲ့တဲ့ Gmail ကို Signin လုပ္လိုက္ပါ။
အေပၚဆံုးမွာ Apple ကပို႔ထားတဲ့ Mail တစ္ေစာင္ေရာက္ေနပါလိမ့္မယ္။
Mail ထဲကိုဝင္ၿပီး Virify Now ကို ႏွိပ္လိုက္ပါ။
Browser ပြင့္လာရင္ Gmail နဲ႔ Password ကိုထည့္ေပးလိုက္ပါ။
Apple ID တစ္ခုျပဳလုပ္လို႔ၿပီးပါၿပီ။
Credit: all
PDF File အေနနဲ႔ သိမ္းထားခ်င္ရင္ ေအာက္မွာ ေဒါင္းပါ
👇👇👇👇👇👇👇
Download Here


No comments:
Post a Comment
Note: only a member of this blog may post a comment.